This article is part of my HOW TO series, aimed to demystify certain parts of the Sitecore ecosystem and make it easy for the community to understand.
Using Sitecore Goals is one of the most fundamental and valuable parts of the Sitecore offering and it is something that everyone working with Sitecore XP show know, even client-side admins.
While it might sound daunting to use, there is a very simple 4-Step process involved in Creating, Adding, and Testing the Sitecore Goals that you use on your website.
Step 1. Create a Goal
- Go to the Marketing Control Panel from your Sitecore Launchpad dashboard.
- Navigate to the Goals folder and click on it to select it.
- Right-click the folder and choose Insert to add a Goal.
- It is normally best practice to have different folders underneath Goals to help you categorize and manage your Goals, especially if you intend on having many of them in the future.
- Similarly with the naming convention, it is usually best practice to name the Goals in a consistent way (e.g. Page View_Home and Page View_Products) so they are easy to find when you need to select a Goal from the Goals pop-up (which lays out Goals alphabetically).
- Now you need to Deploy the Goal, which can be done from the REVIEW tab.
Step 2. Add the Goal to a Page or Item
- Go to Content Editor and find the Page or Item you want to add the Goal to
- Add the Goal
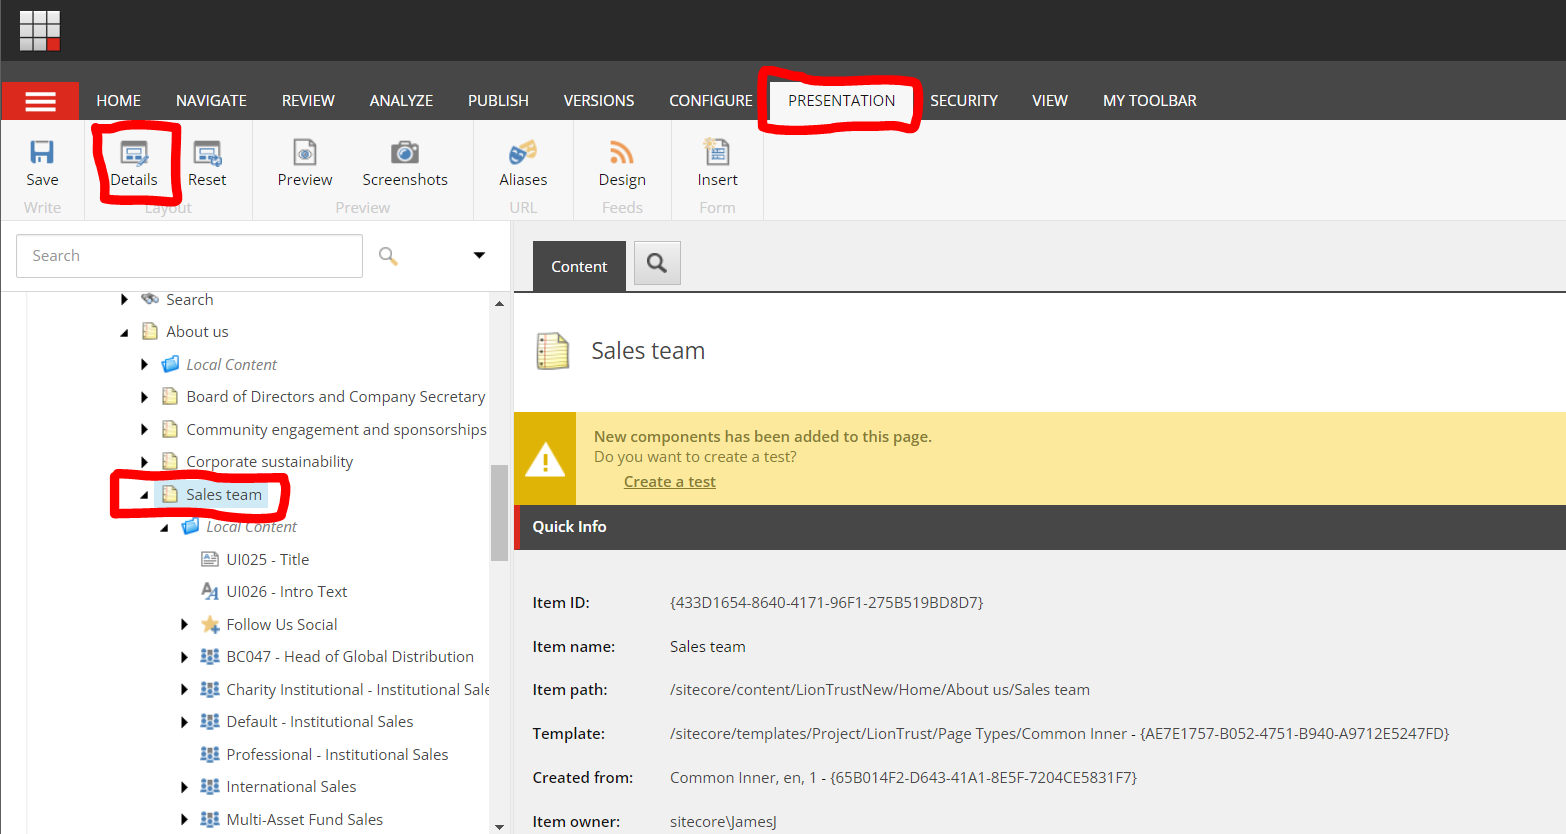
- Page View – To add a Page View Goal to a Page, visit the ANALYZE tab and choose the Goals option. A pop-up box will appear with all the Goals available to toggle. You may choose more than one Goal to toggle.
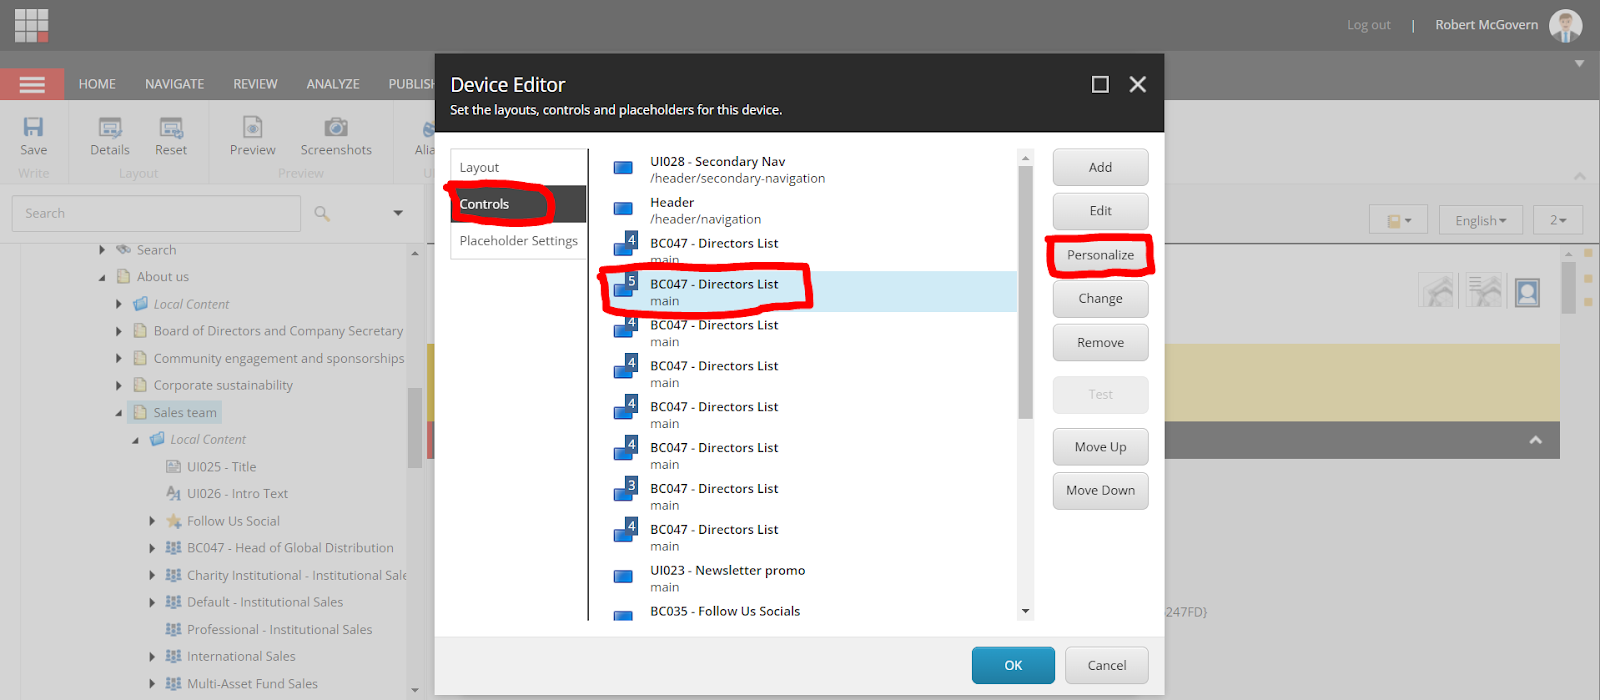
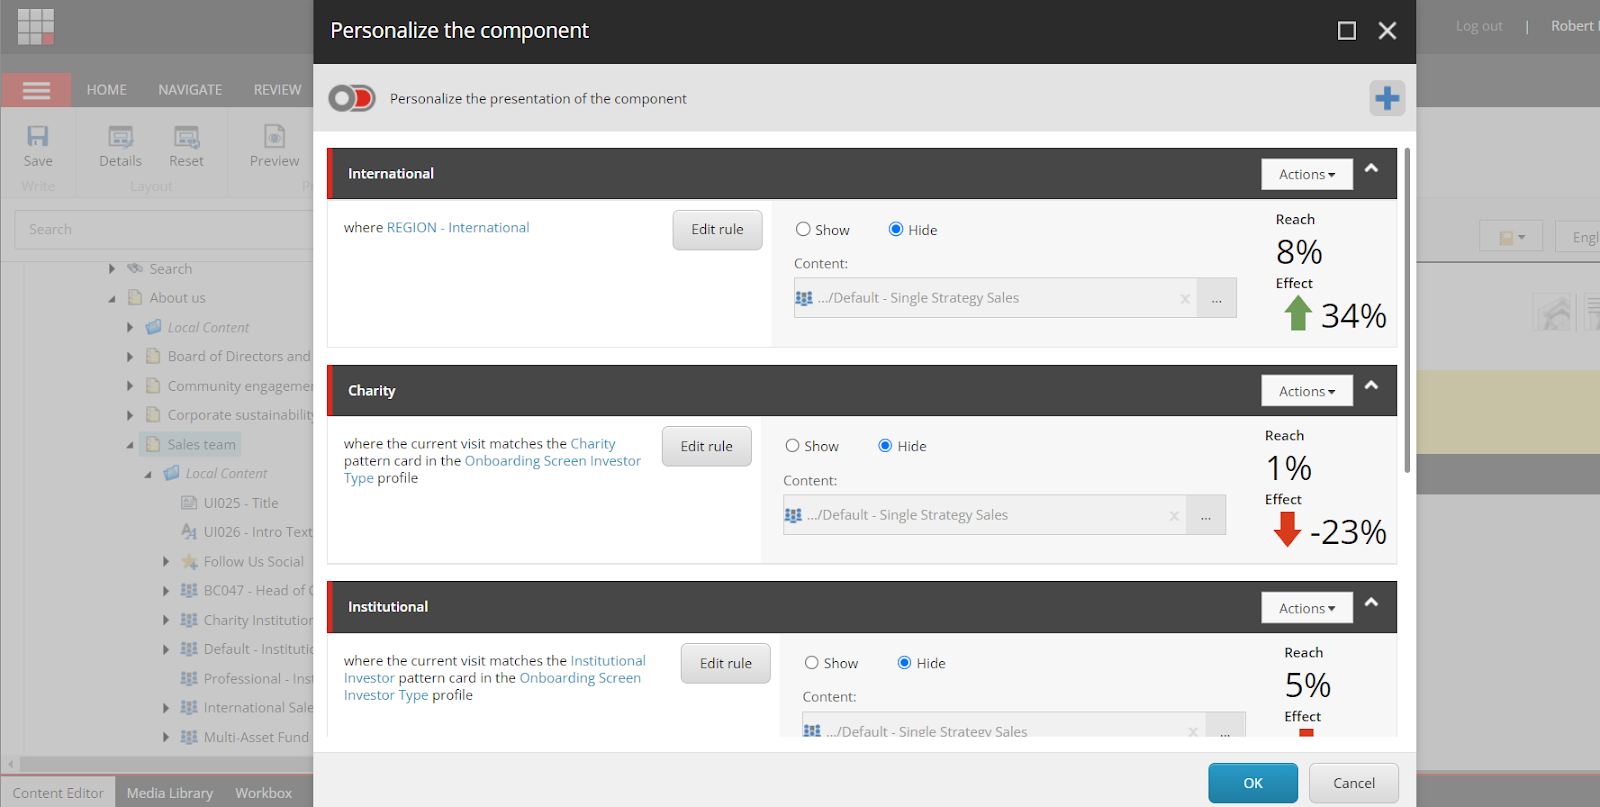
- Component – If you want to add a Goal to a certain Component this should be accessible from a dropdown menu that has been linked to that Component during development. If it is not there, reach out to your developer.
- Click Publish
Step 3. Trigger the Goals
- Now, you need to trigger the Goals to test them and see that they’re working as expected. Visit the Page or Click the buttons connected to the Goals to trigger them in your environment.
Step 4. Check the Goals in Experience Analytics
- To make sure that your Goals are being picked-up as expected, go to Experience Analytics and select the Conversions tab.
- In the Conversions section, there will be Goals sub menu.
- Click into this section and you will see a dashboard with the Conversions, Visits, Conversion Rate etc. for each of your Goals. Manage the date range from the date picker at the top of the table.